For anyone who is serious about mushroom cultivation and wants to control the whole process from start to finish, working with spore prints or spore spraying is unavoidable. An essential step in the process is transferring the spores to agar plates to grow healthy mushroom mycelium. You can buy ready-made agar plates or make your own. In this article, you will learn how to prepare your own agar plates for mushroom cultivation and avoid mistakes.
What is agar?
Agar, also known as agar-agar, is a gelatinous material obtained mainly from seaweed. It is odorless, tasteless and transparent, similar to gelatine, but purely vegetable. Agar is not only used in the kitchen, but is also indispensable in scientific laboratories. In mushroom cultivation, agar is used as a culture medium on which mushroom mycelium grows.
For mushroom growers, agar is essential for cultivating mushroom mycelium and detecting impurities that may occur during the growth process. But why should you use agar in mushroom cultivation?
Why use agar for mushroom cultivation?
If you want to grow healthy mushrooms, it is important to inoculate your substrate with pure mycelium that is free from contaminants and competing fungal spores. This is where agar comes into play.
- Pure culture medium: Agar provides a clean and nutrient-rich environment in which the spores can develop into mycelium.
- Easily detect contamination: If unwanted organisms develop, you can detect them early and transfer healthy mycelium to a fresh agar plate.
- Easy transfer: During growth, you can transfer healthy mycelium from one agar plate to another to ensure the purity of your culture.
What you need to make agar plates
The preparation of agar plates requires precision and cleanliness. Here is a list of the most important things you need:
Materials:
- 10 g agar agar powder
- 10 g malt extract (light, to nourish the mycelium)
- 500 ml water
- Petri dishes (90 mm or 100 mm diameter)
- Digital scales (accurate to at least 0.1 g)
- Autoclavable jars or preserving jars
- Sterilizer or pressure cooker
- Nitrile gloves, 70 % alcohol for disinfection
Instructions for making agar plates
- Create a sterile working environment
Before you start, you should make sure that your working environment is as sterile as possible. A laminar flow box is ideal for minimizing contamination. Alternatively, you can also work with a still-air box. Disinfect your work surface, your hands and the materials used thoroughly with 70% alcohol. - Weighing and mixing ingredients
Use a precise digital scale to weigh out 10 g agar-agar and 10 g malt extract. Place both ingredients in a glass container and add 500 ml boiling water. Stir the mixture thoroughly until the agar and malt extract are completely dissolved. - Sterilization in a pressure cooker
Fill the agar mixture into autoclavable jars (up to 70 % full so that the mixture does not overflow in the pressure cooker). Cover the openings of the jars with aluminum foil to prevent contamination. Sterilize the jars in the pressure cooker at 15 PSI (approx. 120 °C) for 30 minutes. - Allow the agar to cool down
After sterilization is complete, allow the pressure cooker to cool down without releasing the pressure manually. Once the pressure is normal, you can carefully remove the jars. Allow the agar mixture to cool to around 50 °C – warm enough to remain liquid but cool enough to pour safely. - Pour the Petri dishes
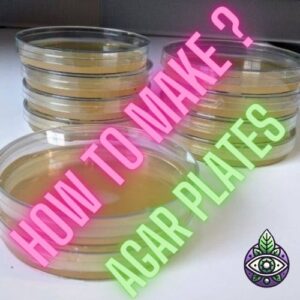
Pour the agar mixture into the prepared Petri dishes so that the bottom of the dish is covered. Leave the dishes in a sterile environment until the agar has set. - Sealing the dishes
Once the agar plates have cooled, seal them with parafilm to protect them from contamination. Now your agar plates are ready for the introduction of the spores or mycelium pieces.
How do you use agar plates?
Once your agar plates are prepared, you can use them to cultivate fungal spores or already developed mycelium. To do this, transfer the spores to the agar surface using a sterile needle or inoculation wire. Within a few days, you will be able to observe the growth of mycelium.
If contamination occurs, you can cut off a piece of healthy mycelium and transfer it to a new agar plate. This is an important step to obtain pure mycelium cultures, which can then be transferred to a larger substrate to eventually grow mushroom fruiting bodies.
Ready-made agar plates or agar mixtures?
If you want to avoid the hassle of mixing and sterilizing, you can also buy ready-made agar plates or agar mixtures in our store at Psychonaut shop. Our products are ready to use, so you can start cultivating straight away. Ideal for beginners or growers who want to get started immediately without having to worry about the preparatory work.
Conclusion: Precision and cleanliness are the key
Working with agar plates is an essential step in mushroom cultivation, especially if you want to grow healthy, contamination-free mycelial cultures. Through precise mixing and careful sterilization, you can ensure that your mushroom cultivation is successful. Whether you make your own agar plates or use ready-made products, the right technique and cleanliness are crucial to the success of your mushroom cultivation.
Visit Psychonaut.es for more information and products to help you take your mushroom growing to the next level.
-
 Hericium Lions Mane – 60 capsules28,90 €
 -
Product on sale
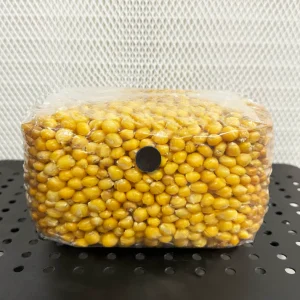
 Sterile grain substrate 500 g maizeOriginal price was: 14,95 €.12,95 €Current price is: 12,95 €.
 -
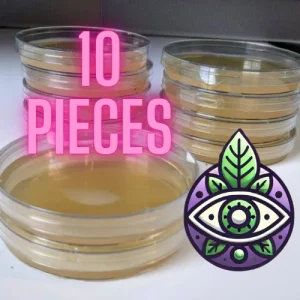
 Sterile petri dishes 10 pieces – MEA14,99 €


